How I up-cycled my $150 chest of drawers
It was a sunny Saturday morning. I woke up quite early for a Saturday, sat up in my bed , waited for my husband to wake up so I could show him the new bunch of cat videos(that he didn’t ask for) , that I had lined up for him to see.

The chest of drawers from Ikea before up-cycling.
While I waited patiently in one of my not-going-down-the-social-media-rabbit-hole-first-thing-in-the-morning phases, I glanced at the chest of drawers right in front of my bed. It was a quick cheap buy from Ikea for a lazy upgrade in closet space. It was brown in color and that’s it, not much character to it. It was also the one odd piece in our bedroom that stuck out and was an absolute eyesore to me, now that I had filled the room with appropriate amounts of color. I decided it was time for a DIY makeover.
Thrilled with this organic early morning idea,I sprang into action, binge watching the numerous how-to videos available on Youtube, unable to land on a single idea. I knew for sure that the current color was not working, and it needed some pastel shades on it to soften the blow and fit perfectly in with the tone of the room.
I decided to zero in on the color palette, and then let my ideas flow once i begin the project, because that’s my best way to deal with creative blocks(just jump into in anyway, yeah!).I also accounted for scenarios where I would have to double restore the chest of drawers, just in case I really disliked what I made.

Dismantled drawers
After some research , i landed on The Purple Painted Lady website (https://shop.thepurplepaintedlady.com), which had some gorgeous shades of Annie Sloan chalk paint that I could use for my art project. I ordered the shades Scandinavian Pink and the Duck Egg Blue which I figured would compliment each other well. Following this, came the hardest part of the project. The sanding! The knobs had to be dismantled and the chest completely sanded down before I could get to the real deal. This took me an entire day and few muscle aches, because yes, i didn’t believe in taking breaks. I couldn’t wait to get to the fun part!
A couple of days later when the paints arrived, you could imagine how I din’t spend a wink to jump right in! All i knew at this point was that the base was going to be a beautiful pastel blue that would perfectly match my curtains.
But half way through the blue paint, my idea evolved into a slightly different one, and as always, I decided to go with it! I used some artists’ tape to make smooth little curved border, and start adding some pink to the remaining half. This, in retrospect was a great idea, and instantly brought a whole new fresh look to the chest.

Duck Egg Blue painted on top

After a single coat of pink paint, and a double coat of blue.
Satisfied with the new result, I let the paints dry for a day between coats, although it was very hard for me to wait to continue with I’m - not -sure -what! It didn’t feel complete, I wanted to do more.

Birds made with acrylic paint.
Three days later, when my canvas was ready for me , I sat down before it thinking it needed a third color to complete the palette. I didn’t have any more shades of chalk paint ordered, but I did have one sample pot of Greek Blue that came with the order. I needed some white as well, but I didn’t have any in chalk paint. So I decided to use my white acrylic paint instead.
I sat down with my white paint, and before i knew i had a couple of bird silhouettes before me.
Now , of course, the birds needed to be resting somewhere, and so i drew some branches along the paint borders with the sample blue chalk paint. I did not forget the knobs, because they would stick out like a sore thumb if they were the only ones left without any upgrade. I used the blue chalk paint and some makers/paints from my collection to give them a new look as well. Here’s how they looked after the revamp.

Custom hand-painted knobs
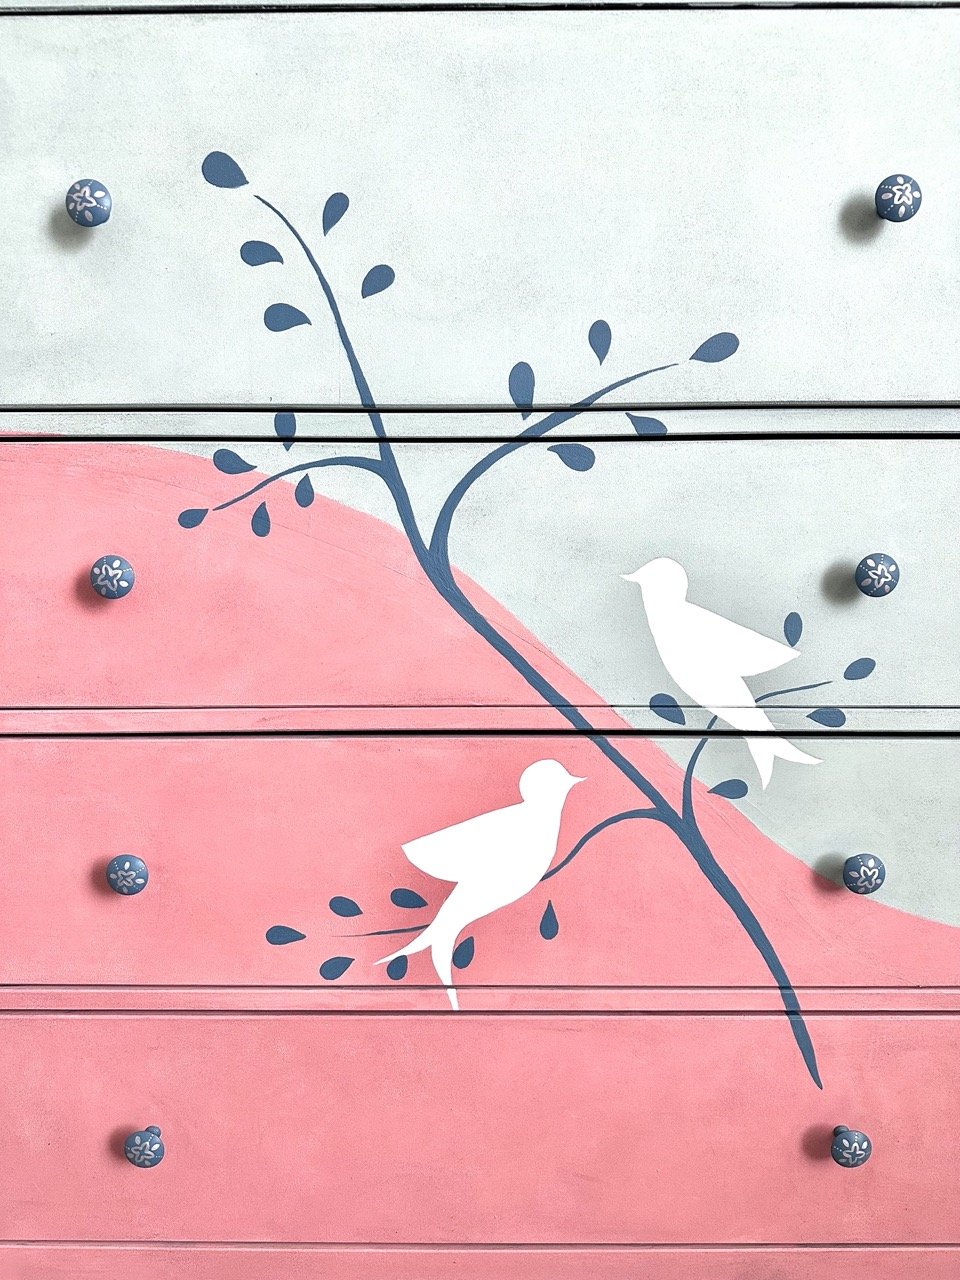
Bird and tree design with knobs on.
I fitted the knobs back in and they very well completed the look I was aiming for. Once I was satisfied with the design ,my last step was to seal the design with some Annie Sloan clear wax. I used a piece of old cloth to coat the chest of drawers with two coats of clear wax, letting it dry for at least four hours between coats.
Two days after, my all-new up-cycled chest of drawers was ready! It now sits very proudly in my bedroom, blending in beautifully with the rest of the decor. This was my first furniture up-cycle, I’m very pleased with the results and can’t wait to try more in future!

